Showing posts with label Cooking. Show all posts

Sunday, August 10, 2014

Taco Pizza

So last night I was really in the mood for taco pizza from east of Chicago.  Sadly, they didn't deliver where we were. R talked me into going shopping and making our own and I think we nailed it!

Shopping:
Pizza crust
Mild salsa
Morning star crumbles (want to try with ground beef)
A packet of taco seasoning
Onion
Iceberg lettuce
Colby jack shredded cheese (finely shredded)
sour cream

Prep:
Cook about half lb meat but use full packet of seasoning
Finely dice the onion
Shred the lettuce

Assemble:
On crust spoon out salsa and spread out like you would pizza sauce. Then add the meat and top with about 3/4 of the cheese and 1/2 of onion

Bake according to crust package directions

Top with sour cream (we put ours in a baggie, snipped off a corner and drizzled it on) lettuce, remaining onion and cheese.

Wait about 5-10 minutes for pizza to cool enough to eat and let rest of cheese melt.

East of Chicago also adds diced tomatoes and sliced olives but we omitted those due to taste preferences. 

I'll add pictures next time we make it!

Monday, August 19, 2013

Kitchen Experimenting

Once again I'm getting creative in the kitchen.

Ok not too terribly creative....and for once my exploits have yielded something decently healthy for frequent consumption.

I'm a huge fan of the Amy's Tofu Scramble breakfast burrito. I'm not so huge a fan of the price. So I decided I was going to figure out how to make one myself

I grabbed a few containers of a great tofu, by Cleveland Tofu, and looked up a few dozen recipes online, and took a little of what I liked from each. 

I came up with a vegan breakfast scramble, that I can make into a burrito, and I actually like it better than the Amy's version. 


Tofu Scramble
4 servings

1 lb extra firm, non silken tofu
1 medium onion
½ green bell pepper
½ tsp granulated garlic
½ tsp kosher salt
½ tsp tumeric
½ cup water
1 TBS olive oil
Fresh cracked black pepper

1. Drain tofu over night, or press for 1 hour
2. Crumble tofu into large skillet on medium heat
3. Combine garlic, salt, and tumeric until evenly mixed, and no clumps
4. Sprinkle spices over tofu, and stir, slowly adding water until a uniform color
5. Dice onion and green pepper, add to skillet and drizzle with olive oil
6. Cook over medium high heat, stirring frequently until onions are translucent and peppers are tender
7. Add pepper to taste and enjoy

Goes very well wrapped in a tortilla for a to go breakfast snack.

Can make and freeze wraps ahead of time:
Make wrap, be sure to warm tortilla first so it rolls nicely and doesn't crack apart.
put about ½ cup scramble in the middle of an 8 inch wrap, and roll up
Place on cookie sheet so not touching and let cool completely
Once cool place in freeze. Once frozen, wrap individually and store in airtight container in freezer.

The hardest part about this is not eating it all!

I plugged this into a few food calculators online, and as far as nutrition goes:
Per serving:
~135 Calories
~8 g carbs
~9 g fat
~9 g protein

Tuesday, March 12, 2013

Cheesecake! Oh and Red Velvet Cake...Together

So, we had company for dinner last Saturday night. We have also been looking for an 'excuse' to try to make some French style food. One of the people that came for dinner LOVES cheesecake. I love to bake cheesecake (ok I love to eat it too, but really trying to watch what I eat). Match made in heaven!

So I started looking for some good ideas for a cheesecake to try. I wanted to do something different, something I had never done before. While browsing around on Pinterest, I saw this picture of a Red Velvet Cheesecake. I knew I had to try it!!

Picture from 1-800-Baskets.com

Now, I've made all the components before, but never thought of combining them. Luscious creamy cheesecake, with decadent moist red velvet, plus tangy sweet and smooth cream cheese frosting. YUMMY!

While, I think I could have done better with the Red Velvet part, I LOVE the recipes I use for cheesecake and cream cheese frosting. I'm going to have to experiment and make some more red velvet cake to see what I like the best. I think the best red velvet that I liked was from a local bakery. It was a really heavy, dense cake, almost like cutting through a piece of fudge, than cake, and the flavor was AMAZING! Plus it was so moist, it didn't crumb up much. Sadly that won't work for this cheesecake.

PUBLIC SERVICE ANNOUNCEMENT: I didn't really remember to take pics, so if you're looking for a step by step tutorial, please let me know. I know a few people who would be MORE than happy for me to make another cheesecake :)

So to break it down, we have a few basic parts that need to be made

  1. The cheesecake
  2. The red velvet cake
  3. The red velvet cake crumbs
  4. The cream cheese frosting
I've had much success with my cheesecakes before. Everyone who's tried them has loved them (talk about an ego boost). What I love about them is they are nice and dense, without a lot of cheesy flavor, and not too sweet, while not being a heavy cake, like when they are made with flour.

The Cheesecake

So for the cheesecake... I was a little nervous because I've never made a crust-less cheesecake before. I actually normally make a double thick crust and pre-bake it before filling it with the batter and baking again. So I held my breath, made the batter, poured it into my spring form pan, and waited impatiently for it to finish baking, and cooling, and chilling. 

The Red Velvet Cake

For the red velvet cake layer I used the Joy of Cooking cake recipe since it is, at least in my mind, one of the tried-and-true, stand the test of time recipes. It's good, just not what I was looking for. I really wouldn't suggest a box mix for this part, since they tend to turn out light and fluffy, and probably wouldn't support the weight of the cheesecake. You also want to make sure your flavor of cake is going to contrast the flavor of the cheesecake, while at the same time complimenting it. So if you make a Vanilla cheesecake, you're probably going to want a stronger flavor cake, like Red Velvet, or Black Forest. Also consider the type of cheesecake you're making. If it's a really moist cheesecake, then you'll probably want to go for a dryer cake, and vice-verse if the cheesecake is a drier, flour type cake. 


I decided on the thickness I wanted for the red velvet layers, and carefully cut my cakes to size. A good trick for this, is once you decide where you need to cut, find something you can use to measure that height repeatedly, and poke toothpicks into the cake at the height all around the cake, about two inches apart. This way, when you go to cut the cake, you have a guide to follow to help you get a nice even layer. I think it's better than buying one of those flimsy cake leveler things anyway. I go all the way around the cake, keeping the knife if the same spot and turning the cake so that I score a line all the way around, this way I know it's going to match up BEFORE I start slicing my cake apart. I also use a LONG bread knife, so that way it goes most of the way through. Less work. 

The Crumb Coating

In order to make the crumb coating, I needed enough cake to have the inside layers, and enough left to crumble up. I ended up using two cakes, the same diameter as my spring form cheesecake. Since I made the red velvet cakes first, and they were cool by time the cheesecake was in the oven, I was able to sit and crumble the left over cake by hand. I found that I had to cut off the top edge of the cake, because it was a bit too dry to crumble nicely, and shave off the top layer across the dome of the cake because it somehow was too moist. 

Let the crumbling commence! I just sat and crumbled by hand, while listening to some fun music since I wanted my crumbs to be a little less than uniform. If you have little ones, I'm sure they'd love to help. If you want a REALLY fine crumb, then get a mesh strainer, like what you would strain stock through to help catch all the little bits of herbs and stuff so you have clear broth. Rub the cake over this and it will break up into a really fine, uniform crumb. Set the crumbs aside, yes you will probably have a lot, that's a good thing!

The Cream Cheese Frosting

I used the Joy of Cooking cream cheese frosting because it's simple, and I know I like it. Well, I know it's a good base. I normally add some buttermilk to help make it not so overpoweringly sweet. I though about adding coconut flakes, but decided against it since they would add one more layer of texture to an already varied cake. I made a double batch, since I knew I would have plenty of cake crumbs left over.

Assemble the Cake!

This ended up not being as scary as it sounds. The trick I found, was to make sure the cheesecake, and red velvet were nice and cold before handling them. If you have time, leave them in the fridge for a few hours. If not, then pop them in the freezer for about 30 minutes (Assuming both are already cooled to room temp!) or until they are cold enough to handle. 

Un-mold the cheesecake from the spring form pan, and use a long frosting spatula to separate the cake from the bottom of the pan. On your serving plate, or cardboard cake round, place the piece you decided to use as the bottom cake layer, cut side up. With the cheesecake loosened, but still on the bottom of the spring form, position the cheesecake near the cake layer, Flip the cake layer over so the cut side is on the top of the cheesecake, then place the serving plate over the cake layer. 

Carefully, holding all three pieces, flip everything right side up together so the cheesecake is on top of the cake layer, with the bottom of the spring form pan on the top. Now you should be able to carefully pull the pan off the cheesecake. If it sticks, get your long spatula hot with tap water, and carefully slide it between the cheesecake and the pan. If the cheesecake is cold enough the pan bottom should slip right off. If it's too cold (like if you forgot about it in the freezer because one or more of life's little distractions got involved) then just wait a while for it to warm up, or carefully put HOT clean wash cloths on the pan bottom to help it unstick. 

Now simply lay the last cake layer on top, and trim and edges that stick out. I had to trim the cheesecake very slightly all the way around. 


Frosting and Crumb Coating

I made sure the frosting was at room temp before starting.

Put a crumb coat on the cake, and put it in the fridge for at least 30 minutes to set up. If you don't know how to crumb coat, then check out this information from Wilton for a little more info. 

Since I wanted part of the top to be clean and crumb free when all done, I cut a circle of parchment paper, positioned it on the top of the cake, and pressed it in gently. This kept the crumbs off the top of the cake so I could pipe icing on later. I left about a 1/2 inch ring exposed so the crumbs would cover the top just a smidge. Once the parchment was in place, I put a final layer of icing around the cake, making it as even as possible, but I didn't pay much attention to how smooth it was. 

This part is MESSY!!!

Get some more parchment paper, or some newspaper to cover the table, scoop up a handful of your crumbs and press them into the side of the cake. Let whatever doesn't stick drop down, then press in another handful. Scoop up the stuff that fell, and keep going, adding in more crumbs as you go. Make sure to get the top of the cake if you're crumbing that too. 

When you're all done, set aside the remaining crumbs. They make great cake pops later. 

Once you have all the stray crumbs brushed off the parchment on top, carefully and slowly peel the parchment off, and pip on frosting as desired. 

If piping cream cheese frosting, remember it warms up and goes all floppy much much faster than butter cream, so keep your frosting in the fridge, and only put a little bit in your pastry bag at a time. 


So, what do you think? I think I did pretty well for my first time trying this without anything to follow other than a picture. I think next time, I might make a chocolate cake, so it turns out more like an Oreo.

Like I said earlier, let me know if you want a more detailed step-by-step tutorial. 

Monday, March 4, 2013

Tea, Soup, and Catching up

Hi All!

For the new followers YAY! Thanks for joining this crazy ride :)

Anonymous - Your request for honeymoon pics has been heard and being worked on. I have to get the laptop they are saved on up and running so I can pull them off.

So it's been a busy time. I've been working on the spring cleaning that I mentioned in my last blog, and have been moving away from electronic cleaning up of clutter to the more demanding, (sorely needed) task of the physical cleaning.

With a break for Valentines Weekend (I can't believe it's been almost 4 weeks since I posted something! Yikes!) Which was memorable, for good and bad. We started off that Friday night with a dinner out at a local place (not a big chain like Olive Garden), tried some new drinks, tried some new food, got some new sparklies for my Pandora bracelet. Then for the second year in a row we went to All Fired Up! and painted some pottery! I chose a large plate, and Hubby made a second storage bowl for us.


These shots are from before they were glazed and fired. Sadly when my husband went to pick them up, the piece next to his had exploded and embedded chunks of pottery into his incredible piece of art! BOO!!! At least they were kind enough to give us a gift certificate to cover the cost of painting another of the same.

Mine made it through unscathed: My mental image of Yggdrasil (very simplified). 


We also got a really cool version of Monopoly since Hubby loves that game, and has many fond memories of playing with his father. It's a vintage version, in a real wooden box (not fake wood painting to look like wood) with the original colors and playing pieces. Unfortunately, neither of us felt very well that weekend, so playing got put off until last week.

Hubby also "adopted" two Red Pandas for me!! Best Valentines Gift. EVER.


We also made a trip to my favorite tea shop, and was able to introduce a friend to their delicious selection of teas! One of my favorite things to do, is to bake goodies to go with tea, and have friends over. Yes, I still love having tea parties, I never out grew that, my friends are just a wee bit different now. They actually CAN drink the tea :-) I find that the most enjoyable times spent catching up with old friends, are generally over a glass of a good drink.

Spring Cleaning

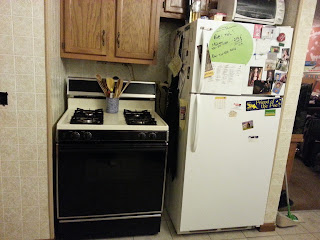
I figured the best place to start is the room we use most. Those that know us, know we LOVE to cook and bake. Of course it also helped that we were in the process of moving the washing machine and dryer out of the kitchen to be put in a newly created laundry room.

I can't find what I did with the old pictures of the kitchen, but with everything in the kitchen, you really couldn't fit more than one person in there very well unless they are REALLY skinny, like supermodel skinny. We love to cook, we love to eat...we are not those people!

Any way, since we had someone out to run new drain, water line, and gas line for the dryer I used that opportunity to really get to cleaning in the kitchen. I started off with my favorite cleaner, Murphy's Oil Soap. It pulls the grime from fingers, cooking, whatever, off quickly and easily. So, here's my list of what get's cleaned when Spring Cleaning in the kitchen comes around.


  • Wipe off cupboard doors and handles, inside and out
  • Remove all contents from cupboard, wipe off shelves
  • Wash all dishes removed from cupboards, wipe off containers and check contents, especially herbs and spices. Toss any that have lost what it means to be flavorful
  • Repeat  above three steps with drawers
  • EVERYTHING on the counter tops are cleaned, and moved so the counter itself gets scrubbed down
  • Scrub the stove, including the front of the oven, and inside. Soak the grates and scrub them clean. It's amazing how dirty they get. 
  • Remove all magnets, pictures, papers etc from the fridge, and scrub it down too. For this I like Windex, or rubbing alcohol. Don't forget the top (like I did and just realized it!)
  • Move the movables, like the stove and fridge, so you can clean under and behind them.
  • Scrub down the walls and base boards, paying special attention to messy areas like the stove, and by the trash can. 
  • Finally, time to scrub down the floor
  • When dry, put everything back!
The floor after moving the stove...YUCK!

This is where the stove was, and that counter was turned 90 degrees to make an L with the stove .
That left just enough room for the fridge door to open

The stove has now been moved to where the dryer was

See how shiny my floor got after scrubbing over it with  Murphy's Oil Soap?! It Sparkles!!

Then we pulled the washer out....Yes, that really is all the counter space we have.

Grimy Nasty stove front

Even more hideous behind the knobs

Again, Murphy's Oil Soap to the rescue! Amazing Difference!

Finally, all done, everything scrubbed. We will some day be putting a dishwasher in that empty spot, and expanding the countertop all the way to the wall!!!

So, now that I have this wonderfully opened up kitchen, and actually have to take more than half a step to get to anything, and it's all nice and clean....TIME TO COOK!!!

I'd been craving some stuffed cabbage, but didn't want to take the time to make all those little yummy rolls of goodness. So I made soup. It was a hit! 

What I did:
1 medium - large onion, diced
Celery - enough that when diced is equal to the same amount of onion ( I think I used 4 stalks)
Carrot - roughly half as much as you have of onion, so I used 2 large carrots
1 stick butter
1 lb ground beef
1 lb ground sausage (I used plain not spicy or sage)
One head cabbage, diced into bite sized pieces
1 packet Lipton soup (I used the lot of a noodle chicken noodle)
1 large can diced tomatoes
about a gallon of water (that's about 16 cups, or 128 oz)
Beef bouillon to make the water into broth (although next time I might just buy broth)
Salt, garlic, oregano, basil, and sugar (to counter the sour from the tomatoes) to taste

The onion, celery, and carrot mixture is called Mirepoix, and is the BEST start to any soup. 


I started off by sauteing the mirepoix with the stick of butter in my stock pot, until the onion were soft, but not translucent. While this was going, I browned and drained the beef and sausage, then added to the stock pot, along with water, and bouillon until I had a good flavor. Then I dumped in the cabbage, soup packet, and tomatoes, and let everything simmer for about an hour so the cabbage was tender. 

I wasn't too happy with the flavor at this point, so I added in a few generous pinches of coarse salt, as well as a generous sprinkle of granulated garlic. Let it simmer more, and it was getting there but not quite. 

So when tasting, I try to keep in mind that the flavors need to balance. If it's too salty, I need to a little sour or sweet. If it's too sour, I need to add a little bitter or sweet, if it's too sweet, then add sour or salty. See how that works? In this case, the tomatoes had made it a bit too sour for my tastes, so I sprinkled in a little sugar. That really helped mellow out the tomato, but it was still there. After added some oregano, and basil, (which adds a little bitter along with their own distinct flavors), and letting it simmer for a while, it was spot on! Served over some freshly cooked rice and YUM!

Remodeling

Now...those big appliances that got moved out of the kitchen....they got switched around to our hall closet, turned laundry room. We are still working on finishing up the walls in that area, but over the weekend, we were able to build a raised floor to set the machines on, and I LOVE how it looks! I was just a tad bit too busy helping hubby build the frame, and then attaching the boards to the frame to remember to stop and take pictures! 

Had to grab a shot before the washer went in.

Well, that's most of what's happened in the past month. Thanks for sticking with my during my long breaks! Hope to try experimenting with more cooking this week, and get a few more recipes up. Take care all!

Friday, January 11, 2013

Reflections, A new year, and new experiments

Sitting here listening to the rain pitter-patter on the sun room roof, wrapped up in a blanket, with a kitten snuggled on my feet, with a wonderful cup of hot tea, felt like the perfect time to sit and reflect on the past year, all the ups, downs, successes and failures. I won't bore you with the bad, but some of the goods from last year were getting closer to some of my friends and family through planning my wedding, I was able to leave my job where I was overly stressed (and also on a contrasting schedule with hubby) so that I could spend more time with him, and with my mom who needed three surgeries. Had THE MOST PERFECT WEDDING I could have ever wished for. Sadly for our bank account, I always wanted the fairy tale, over the top, royal type of wedding, but we did it. Got to meet many of my new family on my husband's side at the wedding. Traveled for the first time out of the country, to the UK. Went to the ocean for the first time IN SCOTLAND, went dolphin watching, again in Scotland, slept in a castle, played ping pong in a throne room, washed laundry in the castle, and hung it to dry in front of a fireplace (I know, I'm different), flew in a propeller plane, and spent hours driving through Scottish and Irish countryside. The final day of our trip, we spent hours at Guinness brew house, fell in love with the drink, and the people of both countries all over again. My mom made it through surgeries on both her shoulders, now we are working on getting things lined up for her back, and my mother-in-law was able to move closer to us and the rest of the family. Made some new friends, and reconnected with long lost friends. Learned how to make several things that we use on a regular basis, and have been able to spend more time with my husband, and our family.

My bouquet from the wedding.

Just like so many people, I've decided to set some resolutions. Not specifically new year's resolutions, just goals I want to accomplish this year in my ongoing quest to live a healthier, happier life.


  1. Experiment more in the kitchen with healthy foods
  2. Reduce use of chemicals in our lives by making more cleaning products (this should also help reduce plastic we use since we won't be buying the stuff in the plastic)
  3. Allow myself to be happier by accepting that I can't do everything, and what I do, doesn't have to be perfect. Accept that I'm allowed to make mistakes. Yes I'm a perfectionist. 
  4. Grow and can more of our own vegetables
  5. Get my craft projects organized, cataloged, and down to a more manageable number
So, in an effort to to complete the craft project resolution, I'm finishing up pairs of socks that I had previously started. I got a pair of dark green socks, and 1 out of a pair of light green socks, both for my hubby, and working on the second of a pair of socks for myself. I know I've covered this in a previous post, but it's nice to get everything down in one spot.

My first self designed sock!

Light green sock for hubby

Start of the toe of the second sock.

As for experimenting more in the kitchen, the other night I tried making foil packet lime pepper chicken, with mashed rutabaga, and steamed broccoli. Turned out pretty well, even with the calamity of the rutabaga eating the knife. 


I started to peel the rutabaga, which was tricky because of the waxy coating, but muscled through it. Sliced a little off the bottom so it wouldn't roll when I'm cutting it, and started to cut it in half. This is about as far as I got the knife through and I couldn't get it to go any more. When I went to pull the knife out it just didn't budge! This is our sharpest knife, and since hubby was a chef for many years, he keeps them pretty sharp. I tried everything I could think of to get the knife out, but no luck. I even (shame on me) grabbed a hold of the knife with both hands and shook it to try to dislodge it. About half way through I realized what a sight I must be. Shaking this knife with a giant rutabaga on it, my hair coming undone, yelling (more growling I think) in frustration. This is the point I started laughing uncontrollably  and ended up kneeling on the kitchen floor, knife still in hand, laughing so hard I was holding my stomach and crying! An adventure indeed! By time I collected myself I simply had to share this moment with a few of my friends and proceeded to text/email them. The modern age of sharing EVERYTHING! 

I ended up leaving the monster on the cutting board and went to preparing the chicken.


Lime Pepper Chicken:
2 Cleaned, and skinless chicken breast
Pinch of Kosher Salt
2 tsp Lime Pepper herb mix
1 tsp onion powder
1 tsp dill
sliced onion (these are like half onion, half chives we found at the farmer's market), they are sweet onions
Olive oil
2 Radishes, sliced
lime juice
2 TBSP chicken broth
2 Pats of butter
2 Squares foil to wrap chicken in

Take 2 tsp lime pepper, 1 tsp onion powder, and dill and mix them all together, breaking up any clumps. 
Sprinkle a little salt on the chicken, then coat both sides with the herb mix.
Drizzle some olive oil over the chicken, then turn it to get the oil on the foil, then turn it again so the oiled side is back up. 
Drizzle a little lime juice over the chicken
Sprinkle sliced onions over chicken
Lay a few slices of radish on top, then top with a pat of butter
Put 1 TBSP broth on top of each chicken, then fold foil in half over chicken, fold and crimp the three open sides shut so nothing leaks out.

Put in 350 degree oven for 30 minutes. Check to make sure chicken is fully cooked before eating please!

Hubby came home, and managed to get the rutabaga chopped and we got that boiled and mashed just like it was potato. Steamed up some broccoli, which was then tossed with butter and a little garlic powder.


So yummy! I didn't realize it, but the lime pepper mix I bought had chili peppers in it, so it was a bit spicy for me, but moist and tender, and full of flavor! The rutabaga tastes kind of like a potato, but is slightly sweeter, with a very light carrot type of flavor. I ended up using the left overs to make something like potato pancakes in the morning with chives and garlic. That was amazing! I think we'll be buying rutabagas more often.

Not too shabby for my first time with a new vegetable!!

Well that's it for now, off to do some laundry so I can use up the store bought stuff, and plan dinner for tonight, baked ginger and lemongrass salmon and asparagus with a creamy dill sauce I think. Maybe work on my fair isle double knit hot pad some more since it's almost finished.

Take care, and happy creating!

Tuesday, December 11, 2012

Comfort foods

It's that season! Time for baked goodies, and comfort foods. Between the grey skies, and nippy weather (although it has been warmer than normal), the Yule decorations, and Christmas music I seem to just want to curl up on my back porch, with a warm kitten on my lap (speaking of the holy terror - she just jumped up to join me), a good book or knitting project, a mug of home made hot cocoa, and a nice big plate of cookies.

Currently in the oven are some super simple, crazy yummy coconut macaroons. I unashamedly and whole heartily blame my good friend Katie. I can't seem to spend more than 5 minutes with her without remembering our mutual love of these delectable, fluffy little treats. Thankfully, it only takes about a half hour to get a batch ready to eat, and are so simple which makes for some of the best yummies.

Don't they just look heavenly?
 Melissa's Cinnamon Coconut Macaroon Cookies

3 cups flaked sweetened coconut
2/3 cup sugar
1/4 tsp salt
4 tablespoons all purpose flour
4 egg whites
1 tsp vanilla
cinnamon sugar for dusting
Mix coconut, sugar, salt and flour together. In a separate bowl, mix the egg whites, and vanilla together. Then pour egg white mix over the dry ingredients and mix well. Drop by generous teaspoons onto a greased cookie sheet (I just use a parchment paper lined sheet) then dust with cinnamon sugar, and bake for 18-20 minutes at 325ºF. 
See? Easy, quick, and oh so delicious! 

Also on the line of comfort food, I made a frittata yesterday. Now, keep in mind while reading this, I despise mushrooms and tomatoes. But I will eat them in this. 

Spinach, Mushroom, and Sun Dried Tomato Frittata

1 Small onion diced
5 white mushrooms, sliced
6 oz Baby spinach
1 cup milk
4 eggs
2 oz swiss cheese, shredded
2 oz cheddar, shredded
1/4 cup sun dried tomatoes, chopped
1/4 tsp garlic powder
salt and pepper to taste

Pre-heat oven to 350º
Sautee onions, mushrooms, and spinach in 10 inch oven safe skillet until tender, and most of the moisture is cooked out. 

Mix milk, eggs, cheeses, tomatoes, garlic (we love garlic, so we tend to use a bit more than called for) and salt and pepper,  then pour over vegetables in skillet. stirring till well mixed. 

Allow mixture to cook until almost set, only stirring at the VERY beginning to make sure everything is mixed together. Remember, this is going to be a solid piece of egg yumminess when done. Then put in oven for 15 - 20 minute or until cooked through. 


Now, one thing I have noticed with this, is no matter how much you let the moisture cook off from the onions, mushrooms, and spinach, there is always more left when the mixture is mostly set. Some of this may be oils from the cheese as well. Just let it bubble away, don't be tempted to try to soak it off. It really is enough for two people, easily, but so yummy it's hard to share some times.

Hope you enjoy your holiday cooking and baking endeavors! 


Friday, December 7, 2012

Christmas Crafting Countdown

OK, it's been an interesting week, both good and bad.

The weekend.

I'm still not sure if the weekends are a glorious invention for the work weary, or just a horrible tease for those wanting a vacation. Either way, we spent a quiet, relaxing weekend at home, each working on our own pet projects (of which I have too many), and watching movies together. I put all the cookies I had managed to make in ziploc baggies to go into work on Monday with the hubby. He also decided to make cottage pie to take in, which of course we had practically nothing for it. So off to the store.

Those that know me, know my loathing of driving this time of year. Not because of the weather, but because everyone else seems to forget how to drive, on top of forgetting politeness, kindness, and generosity, you know, all those things this time of year is about. An turn signals become Christmas lights, and completely optional. Yeah. Please people, if you go to the store, park in the flipping parking spaces! That's what they're there for, USE THEM! Please. But anywho, we got in, got what we needed, and got out.

It was a particularly sleepy weekend at that, and we almost forgot to make the food, we were so warm and snuggled under the blankets watching a movie. ::Sigh:: can't wait to do that again. The cottage pie turned out really yummy, although he added bacon, which really through me off since I don't expect that flavor, but it was still great. Sorry, I didn't get any pictures, but I will share my recipe for Cottage Pie (Shepherd's pie, but with beef instead of lamb)

Shepherd's Pie (Or Cottage Pie)
Left over mashed potatoes abour 2 cups
1 onion, chopped
1 bag frozen veggies of choice thawed, I use the peas, corn, carrots, green beans blend
1 lb ground meat (beef, turkey, lamb, etc)
3 TBS flour
Salt, pepper, garlic powder, rosemary, and thyme to taste
2 cups broth

Sautee the onions and veggies until tender, I toss in a little butter for extra flavor. In another pan, brown the meat, and drain excess fat. combine into large skillet, and add flour, seasonings, and broth. Bring to simmer and simmer about 3 minutes, or until thickened.
Put the meat mixture in a casserole pan, and stop with mashed potatoes. Bake at 400ºF for about 30 minutes or until potatoes are slightly golden and hot and bubbly.

Monday rolled around with it's usual fan fare. Grumpy mornings, lots of coffee, and trying to convince myself not to tell hubby to call off work so we can snuggle and sleep more (I think I always ask at least once). But up and away and off went the cookies and cottage pie. Both were a hit. Apparently several people asked for the recipes too! Got the house all tidied up for the day, and spent a nice evening relaxing.

Wednesday I finally got to crafting!! I made more lotion bars. Well I attempted to. I mixed everything like I have for the past few batches, but somehow I managed to melt my mold! So instead of pretty little bars I ended up with wonky shaped pieces all interconnected. I also somehow ended up with almost 2 oz more at the end than I did the first time around...still haven't figure that one out! On top of melting my favorite mold, I also think I managed to burn every finger at some point. My poor aloe plant can't be happy with me.

Mom and I ended up going hunting at the local craft store for unsuspecting little goodies to work with. Mom found some really cute little mini ornaments, and I found the magnet sheets I needed to make some fridge toys for my girlfriends little girl, the Monkey. She LOVES Madagascar, and a while ago I found some little wooden animals of lion, zebra, giraffe, and hippo. I think I let out a little squeal at the store :). Since I found those, I also found patterns to make the penguins in crochet from that movie, on Wolf Dreamer that I want to try out.

Thursday mom had her shoulder surgery, so I dropped her off at about 10, and went about my day. I got the magnets on the animals, and got them sealed so no worries about splinters or paint chipping off as kids that age always manage to put everything in their mouth at some point. Don't worry I put another coat on top of the modge podge of beeswax to make it mouth safe. I know modge podge is non-toxic, but I feel better knowing there's a layer of natural between the Monkey and her new fridge pets.

I made a cute little present for my sister, but, because a certain someone has a REALLY hard time keeping a  secret, I'm not going to say what or post a picture until after she gets it :) I also started and ripped out probably about 5 patterns for my mother-in-law, trying to find something nice, but quick enough that I'll actually have it done in time for Christmas.

When I went back to pick up mom around 4, they couldn't discharge her, because for some reason she wasn't able to keep her oxygen saturation up high enough. After trying several different things, they finally decided to keep her overnight. Today she was fine, and the Dr's can only suggest that it was simply that her body took a little longer than normal to get back up to speed after the surgery. Spent the better part of the day with mom today, had to get her to the pharmacy to get a script filled, and she needed a few things at the store, which going shopping with mom is never a quick job, but today was even longer than normal because of how much pain she was in. Finally got her home and settled, and fed, and medication in her, and she was heading to sleep when I left.

One good thing about the hours at the hospital, I managed to settle on a pattern and get about 1/4 of it done. Now I have to wait for my wrist to stop aching before I can work any more! Perhaps tonight I can try to make lotion in a mason jar instead. I have some rose oil, and since that is probably my favorite scent, I'm excited to try. If I get to make it, I'll take some pics, and share. Hopefully this will turn out better than my last batch!

Count so far - 1 present completely finished, 7 presents mostly finished, 1 present slightly finished, and 1 present I still have no clue on....yikes!